Namespaces are a way to logically divide and isolate resources within a cluster
They help in organizing and managing different environments (like dev, staging, prod) or teams within a single cluster. Each namespace can have its own set of resources, such as pods, services, and config maps, and they allow better control over resource allocation and access control.
Key points:
- Isolate resources between environments or teams.
- Default namespace is used if none is specified.
- Useful for managing access and quotas.
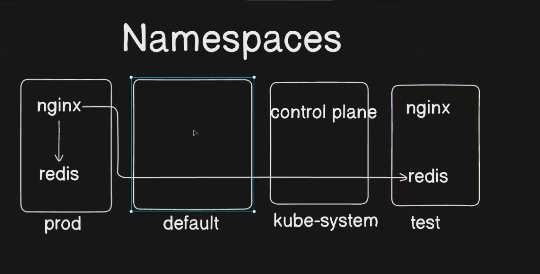
Namespaces in Kubernetes logically isolate resources within a cluster. They allow you to create multiple environments (e.g., dev, test, prod) in the same cluster while keeping resources separate.
2️⃣ Key Features
✔ Multi-tenancy: Different teams can share the same cluster without conflicts.
✔ Resource Quotas: Limit CPU, memory, and object counts per namespace.
✔ Scoped Access Control: Use RBAC (Role-Based Access Control) to restrict permissions per namespace.
✔ Network Policies: Control communication between namespaces.
3️⃣ Default Namespaces
Kubernetes comes with some pre-created namespaces:
| Namespace | Description |
|---|---|
default | Default namespace for resources if no other namespace is specified. |
kube-system | Critical system components (e.g., API server, scheduler). |
kube-public | Public resources, readable by all users. |
kube-node-lease | Heartbeat data for node health monitoring. |
4️⃣ Commands for Managing Namespaces
🔹 List all namespaces:
kubectl get namespaces🔹 Create a namespace:
kubectl create namespace my-namespace🔹 Apply a namespace from YAML:
kubectl apply -f namespace.yaml✅ Example YAML:
apiVersion: v1
kind: Namespace
metadata:
  name: my-namespace
🔹 Use a specific namespace for a command:
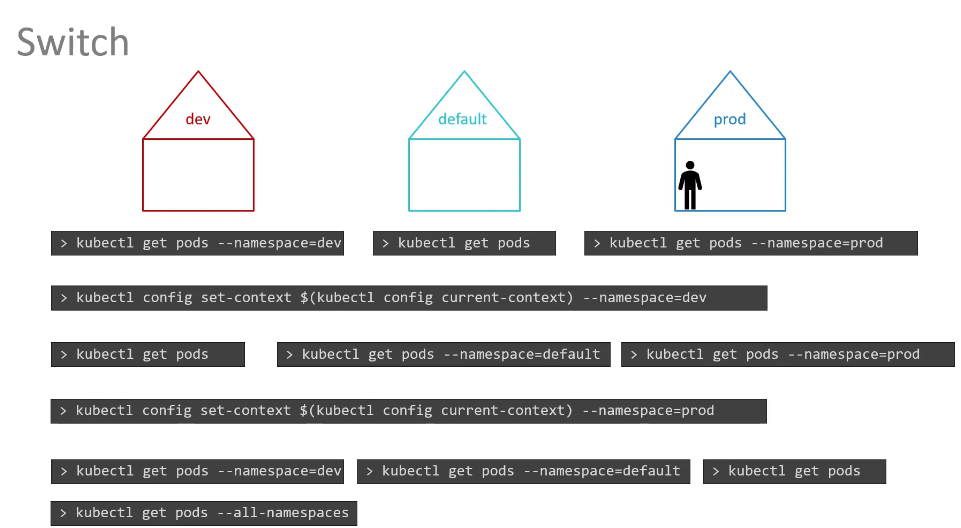
kubectl get pods -n my-namespace🔹 Set default namespace for kubectl:
kubectl config set-context --current --namespace=my-namespace🔹 Delete a namespace:
kubectl delete namespace my-namespace5️⃣ Best Practices
✅ Use namespaces to separate environments (e.g., dev, staging, prod).
✅ Apply resource quotas to prevent excessive resource consumption.
✅ Use RBAC to restrict user access per namespace.
✅ Monitor namespace usage with kubectl describe namespace <name>
💡 Real-World Example
🔹 Deploy an app in a namespace
apiVersion: apps/v1
kind: Deployment
metadata:
  name: webapp
  namespace: dev
spec:
  replicas: 2
  selector:
    matchLabels:
      app: webapp
  template:
    metadata:
      labels:
        app: webapp
    spec:
      containers:
        - name: nginx
          image: nginx